If your beloved front, back, or side door is starting to look worse for wear, then it’s time to break out your tools and get to work. By refurbishing your old door, you can bring it back to life and highlight everything you love about it. You will only need a little bit of know-how and a whole lot of gumption to get this project done right. So, if you’re ready to tackle this project, just follow these steps to refurbish your old door.

- Get All Your Tools and Supplies
To refurbish old doors and make them look like new again, you will need:
- Flathead and Philips screwdrivers
- Sawhorses
- Drop cloths
- Painter’s tape
- Newspaper
- Wood filler
- Power sander
- Tack Cloth
- Sanding block
- 120 to 240-grit sandpaper
- Rags
- Paintbrush
- Wood stain
- Clear varnish
- Safety goggles
- Dust mask
Once you have these items in hand, you can continue through the following steps. Remember to always wear your safety goggles and dust mask while sanding and staining.
- Take Off the Doorknob, Hinges, and Other Hardware
Using your screwdriver set, take the door out of the frame. Then, take it to your work area and place it across your sawhorses that are sitting over a drop cloth. Remove the doorknob, hinges, and all the other hardware. If the door has a window, tape it off with painter’s tape and newspaper.
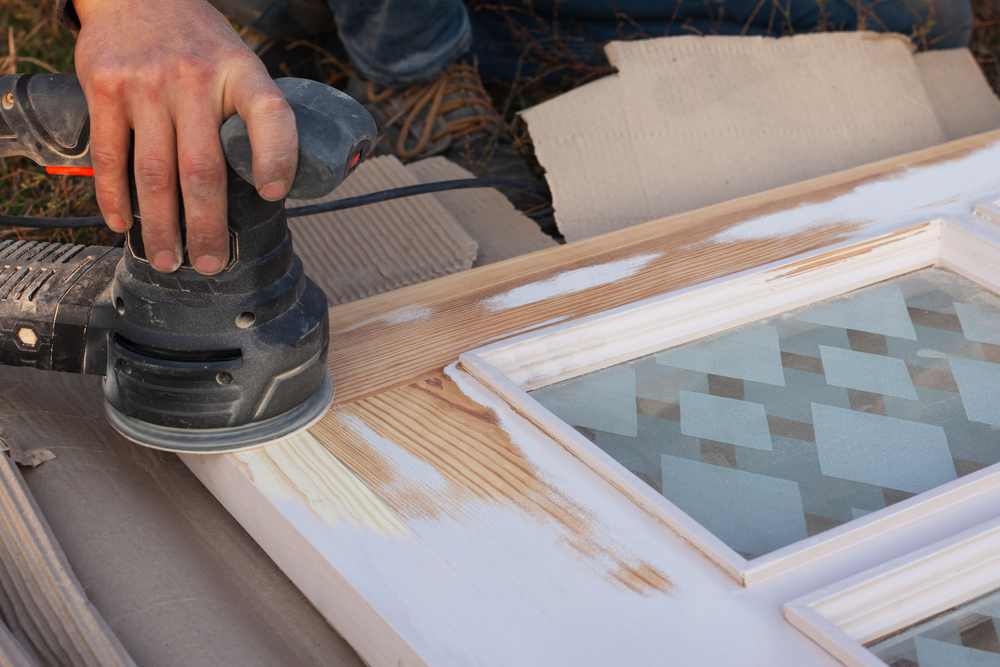
- Sand to Remove the Old Finish
You must remove the old finish in full to restore the look of your door. To do so, start by putting 120-grit sandpaper on your power sander. Sand off the finish on all the flat surfaces on both sides while being careful to avoid rounding out any edges. Then, sand by hand around all the intricate details in the door using the same grit sandpaper. When sanding, use tack cloth to help pick up particles of dust to achieve a smoother look.
- Fill in All Imperfections and Sand Smooth
With the old stain removed, closely examine the door for imperfections. If you find any, fill them in with wood filler and let it dry as directed on the container. Then, come back with 240 grit sandpaper on your power sander and by hand to smooth out the entire door on both sides.
- Apply the Stain to the Surface
After your door is smooth to the touch, you can start applying the stain using your paintbrush. Work in small sections, saturating the wood with stain, and then wiping away the excess with a rag. Let the stain dry overnight and put on another coat if you want a darker finish. If you want a shinier finish, apply a coat or two of clear varnish after the stain dries.
- Reinstall the Hardware
Let the stain cure overnight once again. Then, grab your old hardware or any updated pieces you want to install and put them in place using your hand tools. If you’re using the old hardware, you may need to oil the hinges or doorknob to improve their function.
- Put Your Door Back Up
With all the hardware installed, you can put your door back up in its rightful place in your home. Then, be sure to step back and admire your hard work.
Although refurbishing doors is well worth the time and effort, you can skip all the trouble by getting a new door with help from our team at Nuzum Building Supply. We can help you find a door that complements your home design and exceeds all your expectations. So, give us a call today at 608-637-2116 to get started.