10-Step Spring Maintenance Checklist

The days are getting longer and, albeit slowly, warmer. It’s the perfect time of year to bust out your 10-step spring home maintenance checklist, take stock of winter’s damage, and prepare for the hot, sunny days of summer. If you run into any roadblocks, Nuzum Building Supply has you covered for all your spring home maintenance tools, supplies, and contractors.

 1.  Check and Repair Walkways, Paths, Patios, and your Driveway

Winter’s relentless freeze and thaw is rough on your home’s hardscaping. Walk your property and assess for cracks or other damage to these hardscape features. Pavers and asphalt can be replaced or patched, but concrete may require professional help. Fixing these issues right away will save you from costly repairs or replacements in the future.

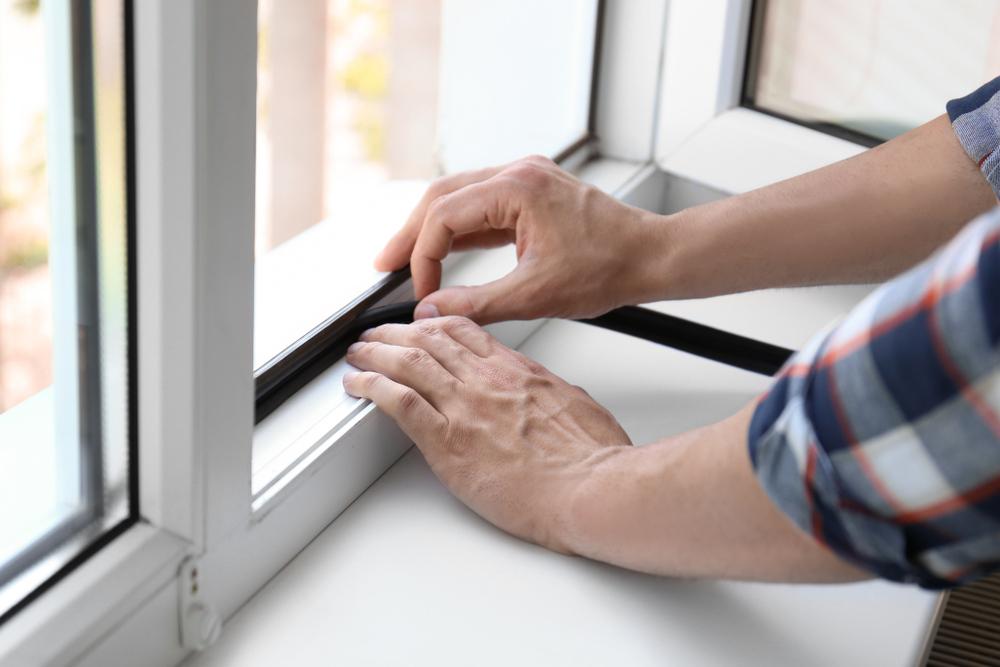
2. Clean and Inspect Screen Doors and Windows

Your windows should fill your home with light and breezy warmth, not bugs and debris. Clean your windows inside and out without using vinegar or ammonia products on the outside which may degrade the siding on your home. While cleaning, inspect screens for holes and either patch, rescreen or replace them. 

3. Examine and Clean Your Gutters and Roof

Your roof and gutters take the brunt of winter storms. Remove any leaves, debris, or other blockages from your gutters. Check for holes, leaks, disconnections, or any locations where the gutter is pulling away from the house.    

Assess your roof for winter damage or uneven wear. Remove any leaves or debris from the roof that can cause leaks. Check for damaged or missing shingles. If you notice any part of your roof that needs attention, contact Nuzum Building Supply to connect with a qualified roofing contractor.

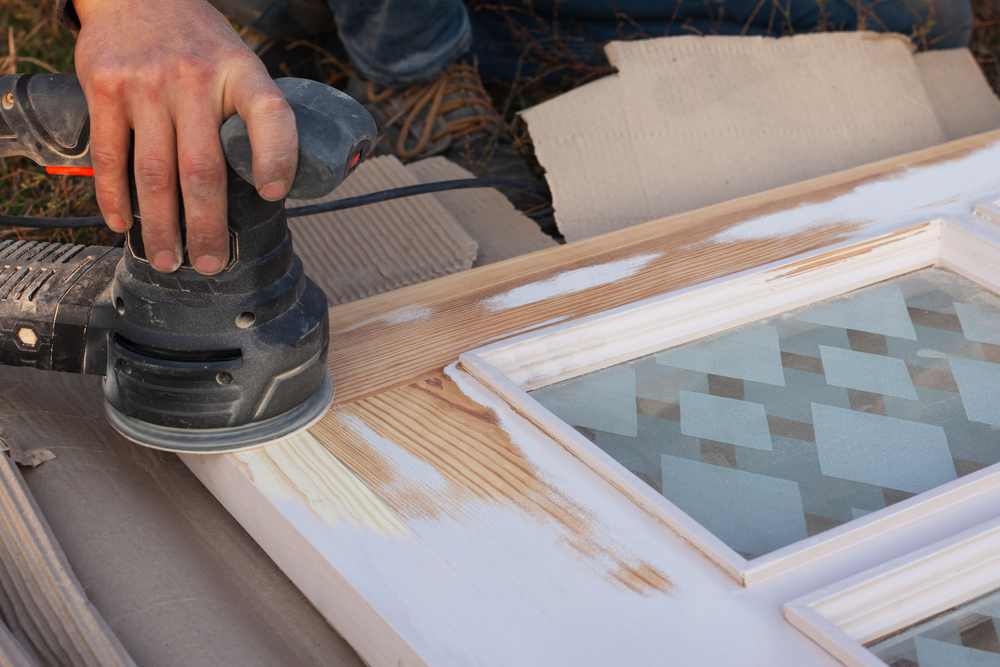
4.  Refresh Exterior Paint and Stain 

Your deck and other outdoor wood elements also suffer from the cold winter weather. Spring is the perfect time to power wash and stain, repaint or reseal your deck, furniture, fence, pergolas, trellises, and any other outdoor wood (i.e. your shed or wood siding). For color ideas, check out Valspar and come on into Nuzum Building Supply for all your painting and staining supply needs.

5.  Service the Air Conditioner

Once again, the milder temperatures that accompany spring make it an ideal time to inspect, clean, and service your AC. Outside you can hose down your unit and ensure all debris is cleared away from it. This is an ideal time to change your HVAC filter depending on routine maintenance instructions. Spring is also a great time to have a professional inspect and test your unit. Ensuring your HVAC system is in working order and ready to take on soaring summer heat will save you money and prevent last-minute emergency service requests when it is 90+ degrees outside.

6.  Prep and Check Outdoor Irrigation

Without the threat of the freeze and thaw, spring means you can now safely reconnect your outdoor water sources. Inspect, repair, or replace any cracked or leaking spigots and hoses. Additionally, run your irrigation system to ensure all sprinkler heads and emitters are functioning properly. Adust the heads that are spraying in the wrong direction or replace any broken heads. Determining that your irrigation system is in proper working order will save you money on your water bill while also protecting a precious resource.

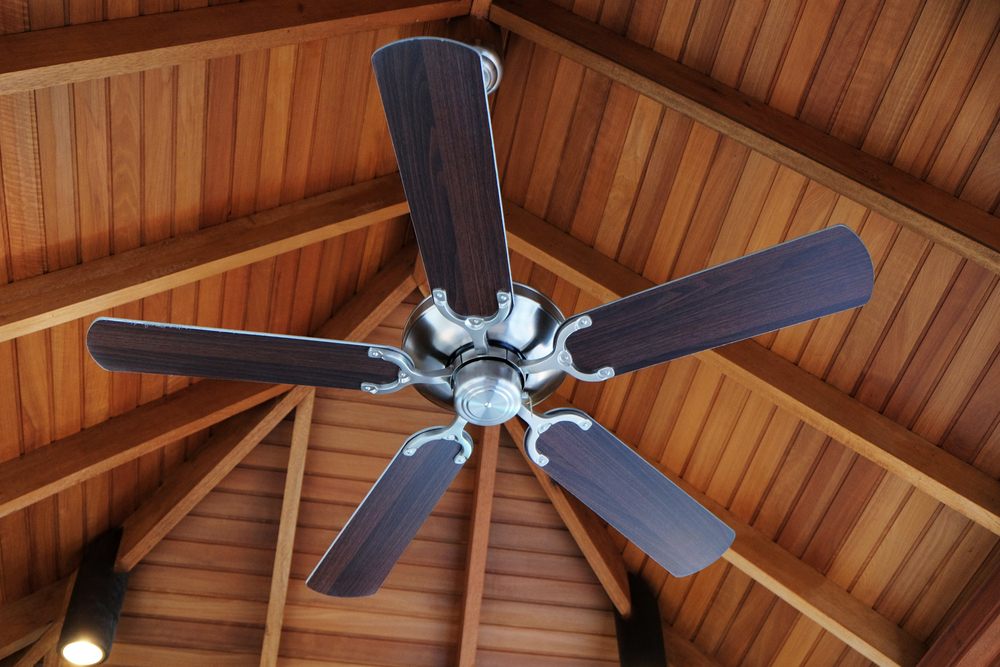
7.  Install and Update Ceiling Fans

Spring is the perfect time to install and update ceiling fans which, when operated correctly, are more cost-effective than cranking the thermostat down. Ceiling fans redistribute cold air in the room by producing a downdraft causing a wind-chill effect so the air temperature feels cooler than it actually is. To change the direction of your fan, simply flip the small switch on the base. In the summertime, your fans should spin counterclockwise.

8.  Inspect and Repair Mailbox

Your mailbox can also take a winter beating from either snow piles built up around it by snow removal or physical damage from the unscrupulous plow. Each spring you should check to be certain your mailbox is sturdy and can still remain upright on its own. The door should open easily and close securely. If your mailbox is beyond repair, either build or install a new one.

9.  Check Outdoor Lighting

With the weather trending warmer, it is now safe and comfortable to spend time outside again. This is the time of year to inspect your outdoor lighting fixtures and make updates or repairs as needed. Pay special attention to your high-traffic areas to ensure your family and friends can safely enter your home after dark. Replace any solar fixtures that can no longer hold a charge and replace bulbs that burned out over the winter. Consider additional lighting for paths, walkways, and entryways, especially steps and dropoffs. Replacing old outdoor fixtures on the front of your home can refresh and enhance your curb appeal.

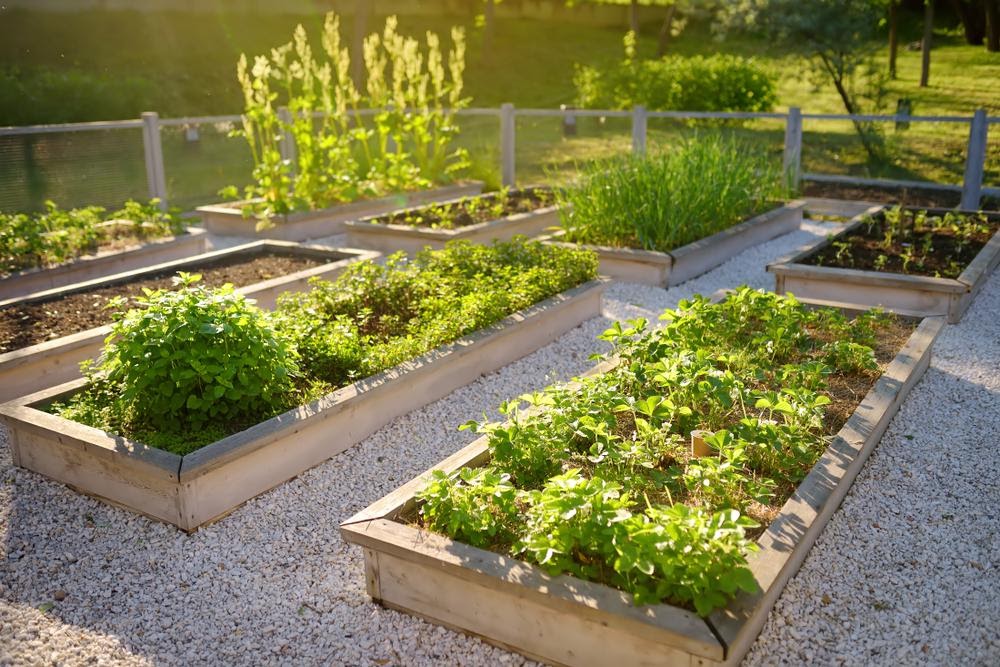
10.  Revive Your Landscaping

Springtime means plants are waking up from the cold, wet winter. This is the perfect time to prune most plants (check to be sure it can be pruned in spring – some plants like lilacs and hydrangeas produce flowers on last season’s growth and should therefore not be pruned until after they bloom). Spring is also the perfect time for planting, fertilizing, mulching, and dividing perennials. Keep an eye on the forecast for the daily low temperatures and late spring frosts. Try to avoid planting until this cold weather has passed. If you have already planted, cover new plants with a sheet until the freezing temperatures depart.

Spring is a season of joy for surviving another winter and rebirth as the landscape rejuvenates, marking another warmer season of growth and outdoor living. By following our 10-step spring home maintenance checklist, you can ensure that your home and yard are completely ready for summertime and more time spent outdoors with family and friends. If you find yourself overwhelmed by any of the spring maintenance projects on your list, do not hesitate to contact us at Nuzum Building Supply for help with ideas, recommendations, supplies, and qualified contractors.

Tips on Improving Outdoor Living Space

Planning for Your Outdoor Living Space Over the Winter

Wintertime is the perfect opportunity to plan for home improvements you can implement once the weather gets warmer. And, one of the best things you can focus on is your outdoor living space. While the snow covers your lawn and backyard, you can start gathering ideas about how you want them to look just in time for spring.

Early Outdoor Living Space Project Planning

Whether you are considering small improvements or a complete renovation, here are some reasons to start planning early:

1. By planning months before summer, you’ll have enough time to put away weekly savings to fund the project. To avoid overspending, you can also start asking for any contractor recommendations who can help you maximize your budget.

2. Planning your outdoor living space improvements in advance also allows you to add more charm and personal style to it. You can spend the winter visualizing a beautiful and unique space that will serve as an extension of your home. Planning ahead also gives you time to let your vision evolve and adjust your plan accordingly.

3. Aside from the design, you can also focus on scouting for the right furnishings at the right price. Items may be less expensive when procured ahead of time than during peak seasons.

Here are some specific activities and areas in outdoor living spaces you can focus on during winter:

Visualizing Comfortable Seating Areas

A great way to reuse old pillows and furniture lying around your house is to incorporate them into your outdoor area plan. You can gather as much material from inside your home to eventually build comfortable seating areas when the weather warms up. Do-it-yourself projects for your outdoor seating arrangements can be done indoors during the winter months, too.

Drafting a Lighting Plan

Lighting adds charm to outdoor spaces. Permanent light installations are worth planning and budgeting over the winter. Uplighting can make areas more inviting. String lights are also gaining popularity, as they add ambiance and help your guests see to safely navigate the yard.

Creating Some Privacy Through Greenery

Winter is a great time to decide on which plants to put around your outdoor spaces come spring. Shrubberies and trees also take time to grow, which is why you should start making a detailed plan early on. Adding landscapes and botanicals are great ways to create privacy around your property. You may eventually need professional landscapers to install trees and thick hedges for your outdoor living space, so you can start engaging them early as well.

Improve Your Outdoor Space by the Spring

Planning your outdoor living space project during the winter months will help you kickoff your spring and summer ready to take advantage of the beautiful weather. Contact Nuzum Building Supply in Viroqua, WI to pick up supplies for your project. We carry the most popular brands, and we can also find you the best local contractors.

Characteristics of Quality Windows

Is it time to replace your windows at home? When it comes to new windows, you have a wide range of options on the market, and it may be difficult to decide. Window style and frame color are not the only factors you should consider when looking for new quality windows.

Certain characteristics must be assessed since they influence how you use your windows regularly. Continue reading to learn more about the features of quality windows.


Quality Windows Should Be Energy Efficient

One of the main characteristics of quality windows is energy efficiency. Windows that are energy-efficient not only make your home more comfortable, but they can also help you save money on utility bills. Buying energy-efficient windows also helps in the reduction of carbon footprint by cutting down energy usage. This can be your contribution to help protec our environment. 

Energy-efficient windows are high quality because they’re also built to provide better insulation than standard windows. They prevent heated or cooled air from escaping your home as well. 


Quality Windows Are Made of Durable Hardware

The hardware is one of the most important components of a window. It includes all the materials and non-metal parts that allow a window to open, close, and remain properly shut. That’s why the second characteristic of a quality window is having durable hardware. 

Quality windows are made of high-grade hardware to ensure durability and longevity. Some of the most common hardware of windows are PVC and fiberglass. PVC windows have a particularly long service life. They stand out for their distortion resistance and high level of functionality. PVC windows can last for up to 50 years.

Fiberglass is also durable hardware that’s difficult to damage during a construction accident or severe weather event. It is made of glass fibers that are resistant to scratching and denting, which are common to other window materials. 


Quality Windows Should Be Easy To Operate

The third characteristic of a quality window is ease of use. A quality window should open and close easily, with no special physical effort on your part. Due to seasonal temperature changes, window frames can expand and contract, making them difficult to open and close over time. For this reason, look for quality windows that can withstand these effects and still be easy to use after several years.

When looking for a new window, don’t be afraid to experiment with the display items. Do they appear to withstand heavy use? Does the window latch close without much effort?

It is important to have a window that is easy to operate, especially during emergencies. Your window can serve as an emergency exit. You do not want a window that is hard to open because it will be difficult to use in the event of a fire or other emergency. 

You also do not want the window to be so loose in its frame that it will not remain in an open position, as this could cause serious injury. A window that is easy to use will help keep you safe during unexpected events.


Purchase Quality Windows From Us

Windows are essential for allowing in natural light and tying the aesthetic of your home together. They are significant investments, so consider every single detail when planning to replace your windows at home. Be sure that you are looking into the characteristics of high-quality windows before purchasing a new one. Call Nuzum Building Supply in Viroqua, WI to buy quality windows for your home.

How to Insulate Windows to Conserve Heat

We know you love staying indoors on a chilly day, just enjoying your personal time reading a book or catching up on your favorite TV show. However, an environment that is too cold is unpleasant. The last thing you want to do is wear layers of clothing at home.

A large portion of heat loss is due to windows, but they’re also an important part of your home because they keep the house cross-ventilated. The best thing to do is insulate them to prevent cold air from entering and still appreciate your “me time” indoors. Continue reading to learn tips on how you can start insulating your windows to conserve heat.

Use Curtains to Keep Heat In

Curtains are one the cheapest ways to insulate windows. Before modern insulation solutions arrived on the market, curtains have helped households restrict cold air from entering their homes. You can use curtains made of heavy fabric or an insulated window curtain. These types prevent heated air from escaping your home by creating a tighter air space for cold air to seep through.

You can hang more than two curtains together to create a sleek layered look that effectively keeps heat in. You can also use blackout curtains that reduce heat loss through the window by a fourth. As a bonus, they also reduce noise pollution by almost half.

Try Weather Strips to Control the Temperature

Weather strips are also a great way to insulate your windows because they seal gaps around them, making your home warmer. There are various types of weather strips, such as foam and V-type. This is the difference between them:

  • Foam Weather Strip or Foam Tape

The foam weather strip or foam tape comes in different sizes, which makes it ideal for irregular-sized cracks. It has an adhesive backing on one side and is commonly used for the top and bottom parts of window sashes. The foam strip is also the easiest weather strip to install.

  • V-Type Strip or Tension Seal

The V strip or tension seal is made of durable plastic or metal folded into a ‘V’ shape that springs open to bridge gaps. It is commonly used for sealing the sides of sliding windows and double-hung windows. It is also easy to use because you just have to cut to the desired length with a pair of scissors, peel, and then stick it to your window.

Apply Insulation Films to Your Windows

Another way to insulate your window is by using an insulation film, which is an item that looks like a food wrap. It creates a barrier between the interior of your home and your windows. These films can be bought from hardware or home repair stores.

Window insulation films are cheap but highly effective in conserving heat at home. They come in kits that include a plastic shrink film that is applied to the indoor window frame using double-sided sticky tape. You can use a heat source, such as a hair dryer, to shrink it and remove wrinkles.

Purchase Insulated Windows

Instead of using insulation products, you can also purchase insulated windows for greater temperature control that prevents cold air from entering your home. Nuzum Building Supply in Viroqua, WI is a locally owned business that offers high-quality insulated products from top manufacturers. We carry insulated windows and doors from Owens Corning, Knauf Insulation, Insulation Materials, and more. Contact us today for a free estimate.

How to Organize a Garage for More Space

Is clutter slowly creeping into your life and taking up your garage space with overflowing items ready to bust out?  Most of the time, we don’t find the time nor the energy to declutter our spaces. For most people, the best place to keep items and forget about them is usually the garage.  However, over time the stored items become overwhelming. Where and how do you begin to declutter and organize your garage for more space?  Consider these six guidelines below: 

1. Get Your Friends to Help

What better way to get help than by involving your friends in your garage organizing project?   Gather your friends over for a garage cleaning get-together.  Make the atmosphere more relaxing by playing music and serving food and drinks.  Trade labor, your friends help you clean your garage in exchange for someday having your help to clean and organize theirs.


2. Plan Ahead

Will you need shelving, storage cabinets, bins, and packing boxes?  If so, purchase these items before starting on organizing your garage.  Having storage shelving, cabinets, and other storage items on hand will minimize the time and energy you require to run to a local store to purchase what you need.

Plan on the number of days you require to clean and organize your garage.  Planning for a day or two within the same weekend will ensure you don’t procrastinate and finish organizing your garage. 


3. Organize your items per category

As you remove all items from your garage, pile them according to their use.  Are they power tools and electricals? Pile these together.  Are they bedroom, living room, or kitchen items?  Give them their pile. And so on.  Next, break them down further into different categories:  Keep, sell, donate, trash.

A suggestion, to avoid keeping items you might never use, ask yourself.  Will I ever use this item in the next 3 to 6 months or 1-year at the maximum?  Remember, you want to declutter and organize your garage, not to clutter it again.


4. Think Vertical Storage

Once your garage is empty, take a paper and draw out a simple layout of where you would like to store the different ‘Keep’ items.  Tall storage shelving or cabinets take up less garage space and store more items.  A long closet with sliding doors saves on space than a cabinet with swinging doors.  A pegboard over a work table or even in the closet for handy tools is more practical than piling them in a box.   Hanging garden tools onto wall pegs is better than placing them on the floor.


5. Organize small items

Bits and pieces such as nails, screws, sandpaper, power cords, and other small bits can be difficult to organize.  Consider using labeled jars or containers to store these different items. 


6. Hang up large items

Items such as ladders, wheelbarrows, mowers, and other large objects take up much-needed space.  Consider hanging them on the wall, if possible, to save on your garage space.


Do you need to build your storage shelves or cabinets?  Give us a call today or stop-in at Nuzum Building Supply for Free Quotes and Estimates.

10 Tools in Every DIY Pro’s Toolkit

You love DIY projects. Whenever something needs to be made, built, or fixed around the house, you’d much rather do the job yourself than call a professional. But in projects like this, you’re only as good as your tools. You’ve moved beyond the standard hammer, screwdriver, pliers, and wrench. What kind of tools do you need to be a real DIY pro? Here are our top 10 picks.


  1.     Circular Saw – There are a lot of different types of saws out there, but this one is probably the most versatile. Much straighter, smoother, and more controlled than a regular handsaw, a circular saw allows you to cut wood of just about any size, from a 2×4 to a sheet of plywood, quickly and easily. With a few specialized extra blades, you can also cut through other things, such as metal, brick, granite, and more.


  1.     Jigsaw – The circular saw is good for cutting straight. The jigsaw is good for cutting different shapes. If you need to cut out a curved piece of wood, or wood shaped in a specific pattern, a jigsaw is what you’ll use. You can also use it in a pinch to bore holes into everything from wood to metal to ceramic tile.


  1.     Cordless Drill – This is important for putting in screws of all types, as well as drilling pilot holes. You’ll use your drill in just about every DIY project. And cordless means you can use it anywhere, without having to worry if the cord is long enough, you have enough extension cord, or if the cord will get in the way. You’ll also need as wide an array of drill bits as possible, in all different sizes and head types.


  1.   Level – Whether you’re hanging a picture, making a cabinet, or building a new deck, you need a good, sturdy, metal level, to make sure everything is even. Many beginners use a cheap, plastic level, but a metal one is sturdier, lasts longer, and is less prone to wear and tear and other damage over time.


  1.     Angle Grinder – Your angle grinder is one of the most versatile tools in your toolbox, and can be used for all sorts of different things. Clean rust and paint off of metal objects. Sharpen your metal tools. Cut bolts down that are too long. You can even use it to cut through stone or concrete.


  1.     Random Orbital Sander – There are a number of different types of sanders available, from disc to belt, but the most common and most versatile is the random orbital sander. They’re fast, powerful, and can be used for most sanding jobs. They can also sand smoothly even against the grain, and eliminate swirl marks. You may decide to get more diverse and specialized sanders down the line, but the random orbital is the best one to start with.


  1.     Nail Gun – This will replace your hammer in most jobs, particularly ones with a lot of nails to put in. Used with an air compressor, not only is your nail gun faster than a hammer, with a lot less effort, but the nails go smoother and straighter, and look much more professional.


  1.     Impact Driver – Similar to a drill, an impact drill has more torque and multiple speeds, so it’s typically used for heavier jobs, such as fastening bolts or anchoring screws into concrete walls. It can also be used in a pinch as an impact wrench. The extra power makes it easy to over-tighten screws, though, so continue to use a regular power drill for jobs that aren’t as heavy duty.


  1.     Router – A router is great for making smooth edges in wood. You can also use it for decorative molding, as well as intricate patterns and designs. Plus, it’s great for cutting dados: joints or trenches in a piece of wood that allows it to link together securely with another piece of wood.


  1. Rotary Multi-Tool – Used for more intricate and detailed work, a rotary multi-tool has a variety of different attachments for different jobs. In addition to sawing, scraping, and sanding, it can be used to polish jewelry, etch glass, carve wood, or even engrave leather. You can also use it for sharpening and cleaning other tools.


Over time, as your DIY skills grow, your tool collection will grow as well. Likewise, as your tool collection grows, your DIY skills will grow, as you become more proficient with a wider array of tools. What tools do you most want to add to your toolbox, and what projects are you looking forward to completing with them? Contact the team here at NuZum Building Supplies today! 


Benefits of Elevated Gardening Beds and How to Build Your Own

Getting the urge to try out your green thumb? Elevated or raised bed gardens are one of the most convenient and attractive ways to add vegetables or flowers to your yard. While many people find the process of making a raised bed intimidating, there is little to worry about. A raised bed can come together in an afternoon with the right materials.

Reasons to Choose Raised Beds

Raised beds have several advantages over ground-level planting. They offer better drainage, which can prevent root rot. Raised beds make it easy to improve your soil to raise fuller, more vibrant plants. They are also easier to work with because you do not have to bed as far in order to use them.

When you start a raised bed with fresh soil, you can avoid many of the weeds that can be a problem when using the topsoil already in your yard. This means less time weeding and less competition for the plants you want to grow.

A raised bed garden is also aesthetically pleasing. Create multiple beds with paths between to add a calming garden oasis to your yard.

How to Build a Raised Bed Garden

Putting in elevated beds is far easier than it looks. Choose the wood for your border and decide how tall you want your beds to be. Depending on your carpentry skills, you can either build the entire bed yourself or buy premade corner brackets. 

Best Wood Choice for Elevated Beds

Many people recommend cedar because this wood is naturally rot-resistant. However, juniper and redwood are also good choices. Choosing rot-resistant woods will ensure that your beds last longer. Many well-constructed beds can last 15 years or more. Our treated MicroPro lumber is also a safe alternative for raised garden beds.

Setting Dimensions for a Raised Bed

How tall the bed should be depending on the soil beneath. If you have good soil that roots can penetrate, a bed that is only six inches high can be sufficient. The most common bed height is 11 inches, which can be accomplished by stacking two six-inch boards. The maximum height for a raised bed is about 36 inches.

Whatever height you choose, remember that you have to add soil to fill it. Additionally, taller beds will need more support than shorter ones because of the weight and pressure of the soil. 

Beds should be no more than four feet wide. This allows you to reach the center of the bed without stepping on and compressing your soil. The bed can be as long as you wish. Just be sure to add cross supports every four to six feet.

Choosing Soil for a Raised Bed

You can use the topsoil from your yard; however, adding soil to a raised bed is an opportunity to choose rich, weed-free soil with improved drainage.

Many people start their first garden with purchased soil. A mix of 1/3 peat moss, 1/3 vermiculite and 1/3 compost offers both drainage and nutrition for plants. If you have a supply of compost at home, you can also make a homemade soil with half compost and half topsoil.


For building supplies and more information on your next home improvement project, stop on in our store or give our team at Nuzum Building Supplies a call! 


Benefits of Installing a Ceiling Fan

When the summer months come knocking at our doors, it’s quite difficult to stay cool and refreshed. It’s even more difficult to stay inside our house because the air is all hot and humid. At the end of the day, we’ll be sweating profusely and truly exhausted from all the heat.

Luckily, there are a lot of ways to make our rooms breezy during the sweltering season. One perfect method is to install a ceiling fan.

What Is a Ceiling Fan?

As the name suggests, a ceiling fan is a fan that is suspended from the ceiling of a room or space. It has hub-mounted rotating blades that help circulate air, thus producing a cooling effect in the nearby area.

What Makes A Ceiling Fan Beneficial?

·       Ceiling Fans Are Also Great for Cold Weather

Most people simply associate ceiling fans as devices to cool down a room. But in reality, ceiling fans are a lot more flexible than that — because they can actually bring warmth to a space as well.

This is because ceiling fans have two settings that dictate the direction of the blades. You can create either a downdraft or an updraft. With the downdraft, the air is blown downwards, thus cooling the area beneath. Meanwhile, the updraft setting draws the cooler air upward so that the warmer air near the ceiling is the one that’s circulated below.

In other words, the ceiling fan is a versatile device because you can use it both during the summer and winter.

·       Ceiling Fans Help Get Rid of Insects and Pests

Summer isn’t just the season for heat and humidity — it’s also the season of bugs, insects, and pests invading our houses. Luckily, if you have a ceiling fan, it’s easier to get rid of them. This is because the breeze works against them, so they’re practically blown away by the airflow produced by the fan.

As a result, not only will a ceiling fan refresh you, but it will also guard you against bothersome insects.

·       Ceiling Fans Can Also Provide Light and Beauty

Over the years, ceiling fan manufacturers have added more functionalities and designs to the products. As a result, the ceiling fans we can find nowadays already come with an extra lighting feature, as well as a stunning design.

This makes ceiling fans a great addition to any room. It will help cool or warm the place, and at the same time, it brightens the place and looks great in the view.


Ceiling fans are a lot more flexible and versatile than we actually think. They can cool down a room or warm it, and they also have a light feature and beautiful design.

Because of this, it’s a great idea to have a ceiling fan in at least one room of your house. Give our team a call at Nuzum Building Supply for everything you need for your project.

Your Step-by-Step Guide on How to Refurbish Old Doors

If your beloved front, back, or side door is starting to look worse for wear, then it’s time to break out your tools and get to work. By refurbishing your old door, you can bring it back to life and highlight everything you love about it. You will only need a little bit of know-how and a whole lot of gumption to get this project done right. So, if you’re ready to tackle this project, just follow these steps to refurbish your old door.

  1. Get All Your Tools and Supplies

To refurbish old doors and make them look like new again, you will need:

  • Flathead and Philips screwdrivers
  • Sawhorses
  • Drop cloths
  • Painter’s tape
  • Newspaper
  • Wood filler
  • Power sander
  • Tack Cloth
  • Sanding block
  • 120 to 240-grit sandpaper
  • Rags
  • Paintbrush
  • Wood stain
  • Clear varnish
  • Safety goggles
  • Dust mask

Once you have these items in hand, you can continue through the following steps. Remember to always wear your safety goggles and dust mask while sanding and staining.

  1. Take Off the Doorknob, Hinges, and Other Hardware

Using your screwdriver set, take the door out of the frame. Then, take it to your work area and place it across your sawhorses that are sitting over a drop cloth. Remove the doorknob, hinges, and all the other hardware. If the door has a window, tape it off with painter’s tape and newspaper.

  1. Sand to Remove the Old Finish

You must remove the old finish in full to restore the look of your door. To do so, start by putting 120-grit sandpaper on your power sander. Sand off the finish on all the flat surfaces on both sides while being careful to avoid rounding out any edges. Then, sand by hand around all the intricate details in the door using the same grit sandpaper. When sanding, use tack cloth to help pick up particles of dust to achieve a smoother look.

  1. Fill in All Imperfections and Sand Smooth

With the old stain removed, closely examine the door for imperfections. If you find any, fill them in with wood filler and let it dry as directed on the container. Then, come back with 240 grit sandpaper on your power sander and by hand to smooth out the entire door on both sides.

  1. Apply the Stain to the Surface

After your door is smooth to the touch, you can start applying the stain using your paintbrush. Work in small sections, saturating the wood with stain, and then wiping away the excess with a rag. Let the stain dry overnight and put on another coat if you want a darker finish. If you want a shinier finish, apply a coat or two of clear varnish after the stain dries.

  1. Reinstall the Hardware

Let the stain cure overnight once again. Then, grab your old hardware or any updated pieces you want to install and put them in place using your hand tools. If you’re using the old hardware, you may need to oil the hinges or doorknob to improve their function.

  1. Put Your Door Back Up

With all the hardware installed, you can put your door back up in its rightful place in your home. Then, be sure to step back and admire your hard work.


Although refurbishing doors is well worth the time and effort, you can skip all the trouble by getting a new door with help from our team at Nuzum Building Supply. We can help you find a door that complements your home design and exceeds all your expectations. So, give us a call today at 608-637-2116 to get started.

Interior Painting Tips: How to Paint Like a Pro

A fresh coat of paint can breathe new life into your home. Painting interior walls is something many homeowners choose to tackle themselves, but you don’t have to sacrifice the quality of the finished job if you do this as a DIY project. With these tips and quality products from Nuzum Building Supply, you can paint just like a pro!

  1. Preparation is Powerful

Before you begin, prep the surface carefully. Oil, grime, and dust on the wall will destroy the final look of your paint job. So will holes in the wall.

Check the surface of your wall for cracks, flaking, and peeling, and sand or scrape these areas to remove the texture. Then, apply a powerful cleaner to remove dust and stains. Fill in holes with putty and allow it to dry thoroughly. Wash grease spots with soap and water.

Prep the room, too. Use canvas drop cloths on floors and furniture that isn’t removable. Sheets won’t protect from paint bleeding through, and plastic is slippery if paint spills on it.

  1. Don’t Skimp on the Quality

Both your pant and your rollers and brushes should be high quality. You’re probably doing the job yourself to save a little money but skimping here will mean a far less effective pant job. Cheap brushes and rollers will shed on your wall, and cheap paint will require more coats, which will then end up costing more. Our Valspar Interior Paint is a great choice. It goes on smoothly and holds up well for years after you paint.

  1. Know When to Use Primer

Primer is helpful to give you a good finish on your paint job, but not every job requires it. Primer is ideal when you’re covering a pattern, such as a mural painted on the wall, or going from a dark color to a light color. It can also help you get an even coat if you’re painting with a very similar color to what you had before.

  1. Use Paint Extender

Paint extender gets mixed into your paint before you paint. It helps even out the paint, which means you won’t see any overlapped areas or brushstrokes. Extender also lengthens the drying time. While this might not seem like a good thing, it actually helps you by giving you more time to check for mistakes and fix them before the paint totally dries.

  1. Do One Wall at a Time

Complete one wall at a time, then step back and look over it carefully, fixing mistakes before moving to the next wall. This gives each wall in your home a seamless look, even if it makes the panting job take longer.

  1. Wash Paint Rollers

Paint rollers are the best tool to paint your walls because they evenly coat, but one problem with them is the fuzz they can leave behind. Washing them with hot water and dish soap will help. This removes the fuzz and fibers and conditions the roller for the work ahead. You can use them immediately even while they’re still wet.

  1. Light It Up

Shine a work light on the wall as you paint, especially in the edges where you have to switch to a brush instead of a roller. This will help you see all of the mistakes and fix them as you go. Even if the room seems well-lit, ad a work light.

Are you ready to get started on your project? Give us a call or visit one of our stores to talk to one of our sales representatives for help finding the perfect paint supplies.